Tuesday, March 28, 2006
The Never Ending Yoga Mat Bag
I have been making this damned bag for almost a month now--I had half a blanket finished in the time it's taken me to get this far with this bag. You would think I was crocheting a sweater for a 300 lb. guy. Or making an afghan for said guy. It's because I'm making really small stitches (104 each row--I can't even tell you right now how many rows I've made). But seriously--this is the latest never-ending project. Oy.
Tuesday, March 21, 2006
I still have projects going on...
Though I haven't had a second to post anything about them. I'm currently working on Brad's blanket, my yoga mat bag, and a couple other things I can't really mention because they are presents for people. I'll post pictures after I send them off :-) Meow!
On a side note, I really have to get my ass in gear and make the other shadowbox for our wedding masks. I also promised to make one for my mom with her masks in them, so I'm going to be busy for the next couple of weeks with projects.
On a side note, I really have to get my ass in gear and make the other shadowbox for our wedding masks. I also promised to make one for my mom with her masks in them, so I'm going to be busy for the next couple of weeks with projects.
Sunday, March 12, 2006
Crochet Flower Bag :-)
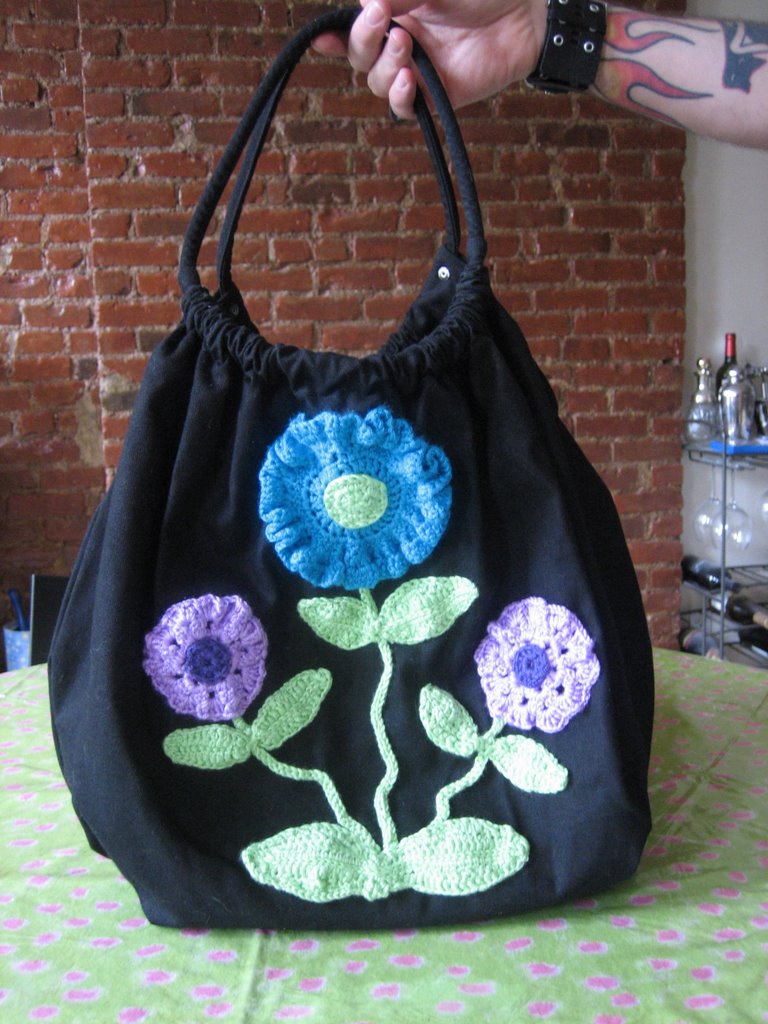
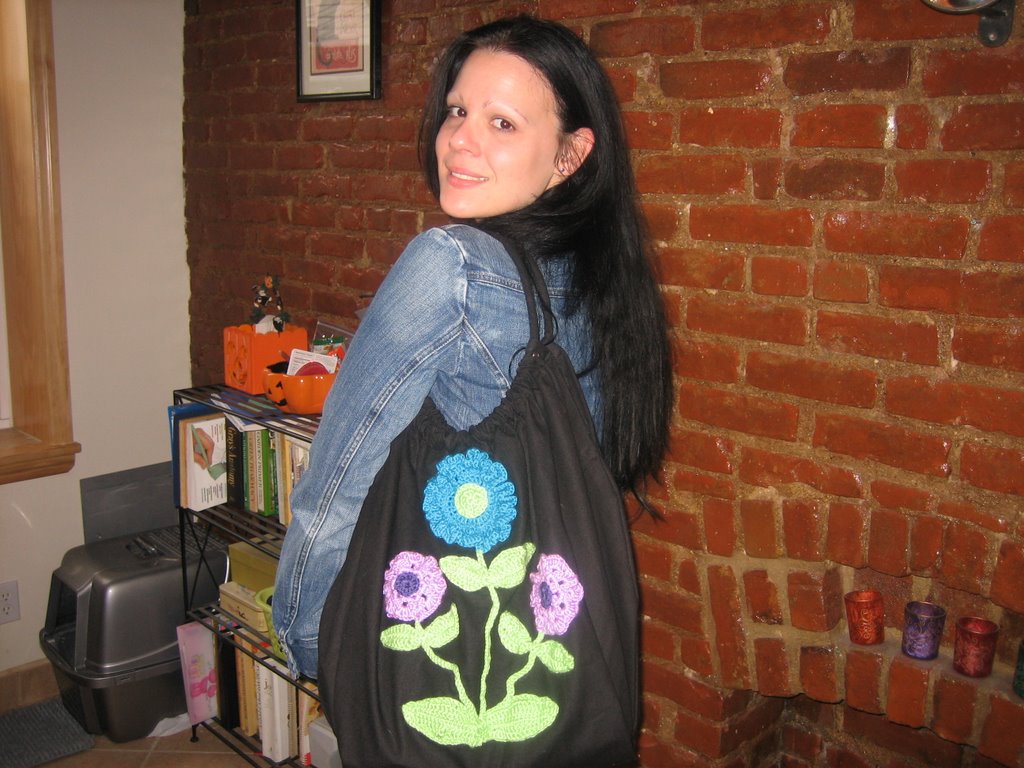
I finished my crochet flower bag last night and I couldn't be happier with how it looks! I posted the details of how the flowers came about in an earlier post, so I'll just explain how I attached them--I split some of the yarn threads and used two threads and an upholstrey needle to back stich the flowers onto the bag (the flowers were held in place with pins while I sewed them on). This is the finished product:


I am probably going to make bags like this one (this size) and also smaller tote bags. I have to find where I can get black canvas tote bags wholesale though--and not the tacky looking ones I saw in American Apparel. I'm so not into a black bag with ecru handles. Ewwww. Can you say tacky? I love the way this bag looks though--it came out perfect!


I am probably going to make bags like this one (this size) and also smaller tote bags. I have to find where I can get black canvas tote bags wholesale though--and not the tacky looking ones I saw in American Apparel. I'm so not into a black bag with ecru handles. Ewwww. Can you say tacky? I love the way this bag looks though--it came out perfect!
Saturday, March 11, 2006
Brad's Blanket
As I was making the blanket for my brother, the request for other blankets started rolling in--first on the list were my husband and my mom. Since Brad was always with me at the craft store, it was much easier to pick out yarn and decide what sort of pattern I wanted to work with. I was still getting the hang of attaching squares, and after spending so much time attaching all of the little squares for G's blanket, I decided that I never wanted to work with granny squares with just 4 rows ever again if it was humanly possible. With that in mind, I thought that doing 6 row squares would be a little less cumbersome, and a lot easier to get through. I also planned on attaching sqares together as I went, as opposed to waiting to put the whole thing together at once which is what I did with G's blanket. If I was going to work with six round squares, I thought it would be best to work in three colors instead of two like my last project. I selected one large skein of the Pound of Love yarn in mint green, and 6 skeins each of the Baby Soft yarn--in lavander, and in a really nice lavander/white/mint green multi. This is the pattern I came up with:

I've gotten approximately a third of the way through the blanket so far--but I've come to the conclusion that I need to work on other projects when working on blankets, otherwise I get a little bored and actually resent working on it. Hence, my current other projects, the bags with the crochet flowers and yoga mat bag flowers. Here's what it looks like so far:


I've gotten approximately a third of the way through the blanket so far--but I've come to the conclusion that I need to work on other projects when working on blankets, otherwise I get a little bored and actually resent working on it. Hence, my current other projects, the bags with the crochet flowers and yoga mat bag flowers. Here's what it looks like so far:


Friday, March 10, 2006
Crochet Flowers...
I'm working on a new crochet project that started sort of as an accident. I wanted to crochet myself a yoga mat bag, but didn't have a pattern, so I thought I could just figure it out as I went along. I started out trying to crochet in rounds--which was a lot more complicated than I thougt it would be! Instead of the circle coming out flat, I kept getting wrinkly circles! Then I noticed that the wrinkly circles were actually very pretty, and I got an idea...why not turn them into flowers and use them as embelishments for bags/purses/pins? Seemed like a good idea, so I got to work making flowers!
While creating the flowers, I thought it would be a good idea to make leaves and stems as well, but I had no idea how to make leaves--so I figured it out by trial and error--and came up with a good pattern to follow. I basically chain stiched 12 stitches, then did one slip stich, 2 sc, 2 hdc, 2 dc, 1 tc, 1 dc, 1 hdc, 2 sc into one sticth. I then repeated the pattern going in th opposite direction (2 sc into one stich, 1 hdc, 1 dc, 1 tc, 2 dc, 2 hdc, 2 sc, 1 ss). I then did the other side of the leaf, following the same pattern. After the leaf was complete, I slip stiched down the center of the leaf to make it look like the veins of the leaf. the stems are just slip stiched chains. This is what one of the flowers and leaves look like:

After I had three flowers made, I started thinking about what kind of bag to attach them to. At first I thought I wanted to crochet a bag and attach them, but since this was my first attempt, I thought it would be good to go with something already made. The flowers themselves were teal and lavander, with light green leaves and stems, so I thought that a black background would match the best, and also be the most practical...so Brad and I headed over to American Apparel to purchase a bag that would work.
I've attached the flowers I've already made with straight pins, but I still have some stems and leaves to finish making. This is what my project is looking like so far, but I am far from finished. As soon as the bag is complete, I'll post pictures of it:

While creating the flowers, I thought it would be a good idea to make leaves and stems as well, but I had no idea how to make leaves--so I figured it out by trial and error--and came up with a good pattern to follow. I basically chain stiched 12 stitches, then did one slip stich, 2 sc, 2 hdc, 2 dc, 1 tc, 1 dc, 1 hdc, 2 sc into one sticth. I then repeated the pattern going in th opposite direction (2 sc into one stich, 1 hdc, 1 dc, 1 tc, 2 dc, 2 hdc, 2 sc, 1 ss). I then did the other side of the leaf, following the same pattern. After the leaf was complete, I slip stiched down the center of the leaf to make it look like the veins of the leaf. the stems are just slip stiched chains. This is what one of the flowers and leaves look like:
After I had three flowers made, I started thinking about what kind of bag to attach them to. At first I thought I wanted to crochet a bag and attach them, but since this was my first attempt, I thought it would be good to go with something already made. The flowers themselves were teal and lavander, with light green leaves and stems, so I thought that a black background would match the best, and also be the most practical...so Brad and I headed over to American Apparel to purchase a bag that would work.
I've attached the flowers I've already made with straight pins, but I still have some stems and leaves to finish making. This is what my project is looking like so far, but I am far from finished. As soon as the bag is complete, I'll post pictures of it:
Thursday, March 09, 2006
Cufflinks...
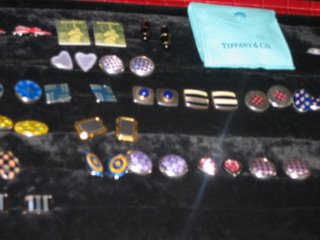
Brad and I spent the better part of a recent Saturday searching for a new suit for him and also gathering materials for me to make him a new cufflink box. Brad is obsessed with fancy cufflinks. When we first started dating, I made him a cufflink box (approximately 7 X 9) to store all of his pretty cufflinks, but he has long since outgrown it (the Tiffany cufflinks he got for his birthday deserve their own darn box heehee) and had been hinting that he needed a new one. I can’t possibly say “no” when someone comes up with a new crafty project for me, so of course I agreed.
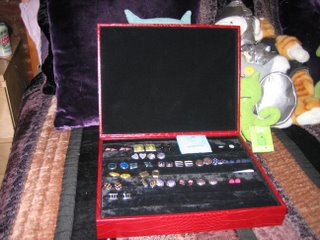
We searched high and low for the perfect box and finally found a faux red crocodile leather letter box in Barnes and Noble (after we purchased a different box in Michael’s Arts & Craft Store which we later returned) and had to go to another craft store called the Rag Shop near our house to get a piece of soft foam to make the inside of the box.
After I got all my materials home, measured the inside of the box (height, width, depth) and then cut the soft foam to fit snuggly inside. I then measured the foam itself, and cut it into 8 long, equal width strips. I then pulled out this beautiful black silk velvet that I had left over from a skirt I made myself a while back, and cut the fabric into strips so each piece of foam could be completely covered in velvet before inserting it into the box. I got out my glue gun, and I was ready to roll! I glued the velvet onto each individual strip of foam. After the glue dried, I placed each velvet covered foam strip into the box to be sure of placement. When I was about halfway done, I realized that I was running out of space! There was no way that all eight strips of foam, covered in velvet, were going to fit inside the box. Seven strips, however, did fit perfectly. After all 7 were placed in the box and I checked to make sure they were snug, but not too snug, I glued each strip individually into the box. After all the glue dried, Brad had a grand ‘ole time placing his cufflinks into the box.
I was very pleased with the way this cufflink box turned out, and considering how much you’d have to spend on one of these babies in a shop or online, I’d say Brad and I go off pretty cheap. The crocodile leather letter box cost $20, the foam was $3, and the velvet originally cost me around $14 a yard when I bought it, but I only used around a ¼ of a yard. It took around an hour and a half to put it all together—and a day of running around gathering the materials. Not bad I tell ya!


Tuesday, March 07, 2006
The Bridal Shadowbox--Click me!
Here's a link to my blog about a shadowbox I made for my bridal bouquet and wedding invitation.
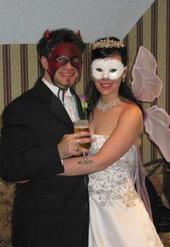
I actually have to make another one very soon! Since my husband and i got married on Halloween, we bought these really beautiful masks--I went as a fairy, he as a demon. Well now our masks (which set us back quite the pretty penny let me tell you!)are sitting in a box in storage with a whole bunch of other things from the wedding. Well I need to get those pricey masks into a shadowbox themselves! I'll post pics of that when it is finished.
Here's my husband and I in our Wedding Halloween masks:
The First Blanket--Click me!
Here's a link my blog about the first crocheted blanket I ever made :-)
This is the original plan for the blanket that I sketched out when I started:
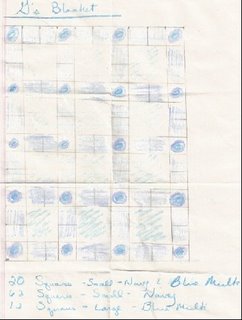
This is the original plan for the blanket that I sketched out when I started:
Scarves, scarves, and more scarves...
Of course, as a crochet beginner, the first projects I took on were of the scarf variety. I crocheted my little heart out during all of December to make sure I had some comfy, cozy homemade presents to give my loved ones. I experimented with various types of yarn, and thanks to feedback from my mom, I've decided that I do not like the Lion's Brand Homespun. It sheds all over everything! I prefer working with chenille and cotton thus far for scarves because they just hold their shape nicely and are very soft.
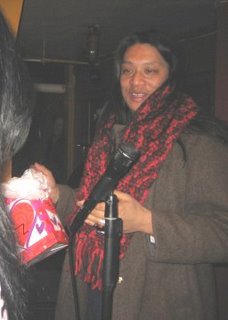
Here's a sample of a recently-made scarf:

I made this one as a prize for a poetry contest my husband and I ran at our last poetry reading. Here's Will, the recipent of the scarf!
Here's a sample of a recently-made scarf:
I made this one as a prize for a poetry contest my husband and I ran at our last poetry reading. Here's Will, the recipent of the scarf!

Thursday, March 02, 2006
I'm a krafty lady!
I decided to start a blog dedicated to the various crafts I work on (or krafts as I like to call them) because I spend so much of my free time working on them. Krafting is something I do because I love making things and working with my hands, and because it is very soothing and zen-like. In today's crazy, stress-filled world, it's nice to do something that doesn't put added stress in your life. To me, coming up with a project, gathering the supplies, facing obstacles and then problem-solving through them, is very satisfying. The name of this blog (and my website) was coined by my best friend Jenn--whenever I'd tell her about my latest krafty project, she'd start singing the Beastie Boys song "She's Crafty." Though that wasn't what the BB had in mind when they wrote the song, it sort of became my krafting moto :-)
I'm currently obsessed with crocheting, but I've enjoyed all sorts of kraft projects over the years: sewing, tiling, making boxes, collage, candle-making, soap-making & beauty products (like salves, scrubs, and perfume), and the list goes on and on.
The first thing I can remember making were clothes for my Barbie dolls (who were very far from normal looking Barbies with their marker dyed hair and punk rock make up, but that is a whole other story). I used scraps of fabric that a neighbor gave me (left over from her quilting projects)and first started draping, and then moved on to actually sewing them together. I think I was around 8 years old when I sewed my first Barbie outfit. I still remember it: a knee-length pleated skirt in grey with small white polka dots. I have always loved polka dots. I wish I still had it, but I have a picture of it in my head. I probably remember it better than it was, but still. I remember using hook-and-eye closures on it, so the skirt actually stayed on the doll! No safety pins! But I'm getting away from the topic.
This is a blog dedicated to all of my various kraft projects. I'll probably start out with some pictures of recent projects that I've already completed, and then move onto the ones I'm in the midst of. I'm looking forward to getting feedback from other krafty-minded people, and discussing all things krafty. I am in the middle of building my website, www.sheskraftyonline.com, where I will be selling some of my handcrafted and homemade products. Looking forward to hearing from everyone!
Enjoy!
xoxo
christine
Subscribe to:
Posts (Atom)